
Vampire Blood and Bone Cake
- Oct 28, 2016
- 4 min read
I get so inspired this time of year, as Halloween approaches. It seems that everyones inner creative spirit is unleashed and there are so many amazing craft and baking projects on the go – my Pinterest board has been bubbling over with Halloween ideas!
I am having a couple of Halloween parties this year so have been coming up with some spooky treats to share. Grab your best meringue recipe and join in!

This meringue ghosty photo was from last year’s fun. So easy to do and everyone will love them. Whip up your meringue mixture and spoon into a piping bag. Then pipe a big dot on a baking sheet and quickly pull the piping bag straight upwards to get the ghosty peak. Once baked and cooled you can paint on eerie faces on and there you have it!
This year I piped my meringue into bones. Just spoon your meringue mixture into a piping bag with a round nozzle and start by piping a small ‘v’ shape and then continue piping in a straight line down from that and finish with an upside down ‘v’ at the bottom and it will look like a bone.
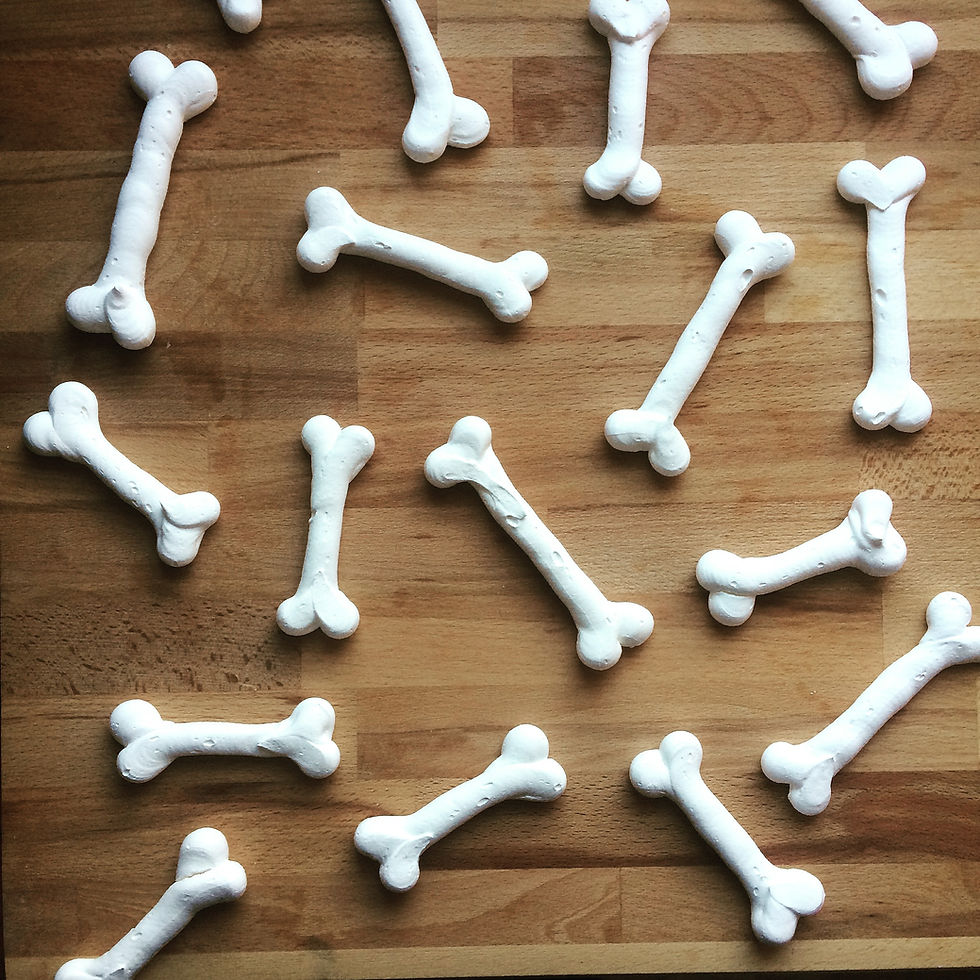
A good tip when you are baking meringues is to let them cool in the oven completely before removing them. Once they have baked, just turn the oven off and leave them until cold, this will stop them cracking from the quick change in air temperature.
I chose my meringue bones as the decoration for my Vampire Blood Cake also known more commonly as Red Velvet cake with a vanilla cream cheese frosting. If you haven’t tried red velvet what a treat you are in for. It uses cocoa powder to give it a depth of flavour and then bicarbonate of soda and white wine vinegar to lighten the sponge…and of course red food colouring* for the amazing colour.
Vampire Blood and Bone Cake
300g caster sugar
120g soft unsalted butter
20g good quality cocoa powder
2 tsp of red food colour paste (such as sugarflair)
1 tsp vanilla paste or essence
1 tsp table salt
240ml natural yoghurt
300g plain flour
1 tbsp white wine vinegar
1 tsp bicarbonate of soda
Cream Cheese Frosting
100g soft unsalted butter
600g sifted icing sugar
250g full fat cream cheese
1 tsp vanilla essense
It is a good idea to weigh all your ingredients out ready before you start, as the steps you will follow need to be done quite quickly together.
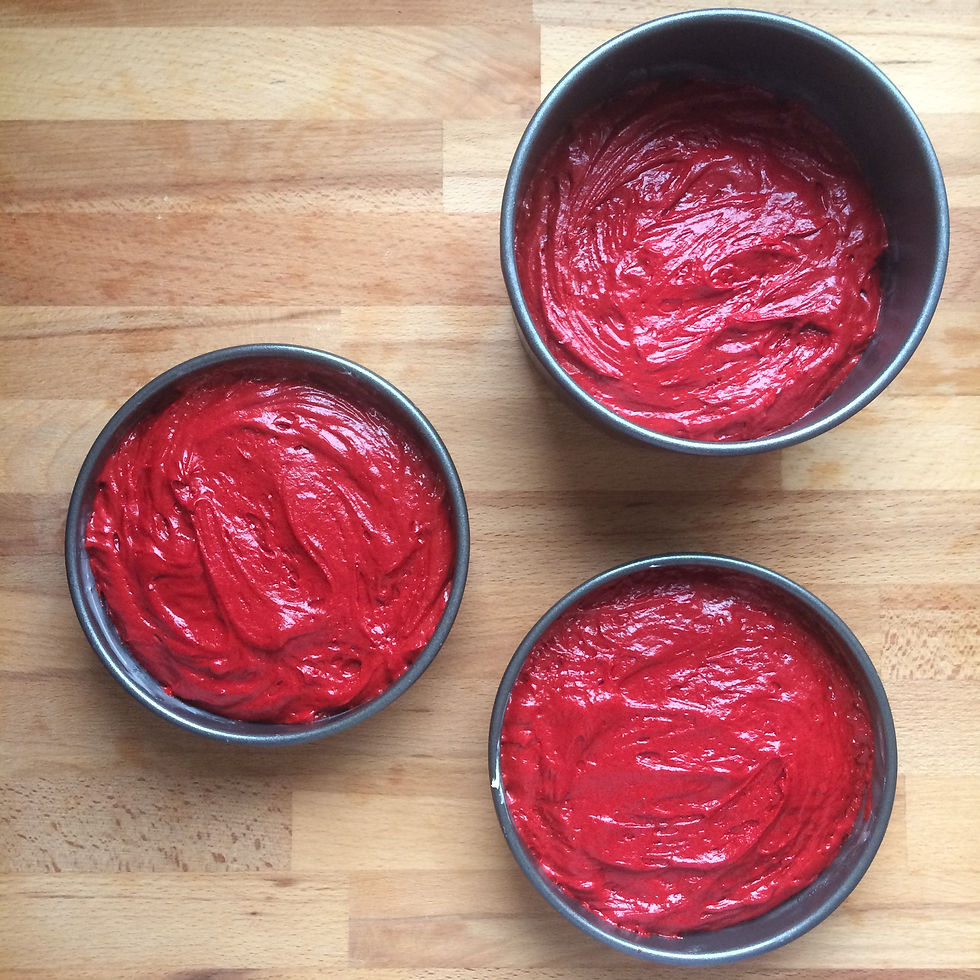
Preheat oven to 180ºC and grease and line 3 15cm/6inch cake tins and set to one side.
Cream the butter and sugar for 5 minutes or until it is pale and fluffy
Add one egg at a time and beat throughy in between to allow it to fully combine along with the vanilla essense, finally beat in the red food colouring.
In a separate bowl sieve together the cocoa powder, salt and plain flour and slowly add it to the cake mix in three stages adding a spoonful of yoghurt in between. Add any remaining yoghurt after the flour has been added and mix through
In a small bowl mix together the white wine vinegar and the bicarbonate of soda, it will fizz and foam up so try to get it into the cake mixture as soon as you can. Then gently fold it through the mixture by hand using a spatula, so you don’t loose the air it created.
Divide the mixture between the three pans and bake in the oven for 20 minutes or until baked through.
While the cakes are baking you can make the cream cheese frosting. Beat the butter in a mixer until pale and fluffy, then add half the icing sugar and mix again until combined, then the other half and mix again. Add all the cream cheese and beat again until it is all mixed together. Be careful not to beat for too long otherwise the cream cheese may split.
Once the cakes are baked, leave them to cool on a wire rack before trimming and icing.
You may find the cake layers have a slight dome to them, using a bread knife, very carefully cut the dome off to leave a perfectly flat surface. Reserve the cake cut offs as you will use them in the final decoration.
To decorate, place one layer on a cake board and spoon a dollop of the cream cheese frosting on top, spread to the edges and then add the next layer. Repeat until you have all three layers staked up. Finally spread the cream cheese buttercream over the top and sides of the cake and smooth the edges with a palette knife. You will have plenty of cream cheese buttercream so reserve some to stick the meringue bones onto the cake. Don’t worry about making the finish perfect as you will be using the meringue bones to cover the sides.
Leave the cake in the fridge to cool for an hour as this will give you a firm base to work with.
Once the cake is chilled, spread a small amount of cream cheese buttercream onto the back of your bones and arrange them all around the sides, break them in half to fill and gaps – it gives a good effect.
With the cake cut offs, rub them between your fingers to create crumbs and then sprinkle them on top of the cake.

There you have it, vampire blood and bone cake – lots of fun for Halloween! I hope this gives you some inspiration for your celebrations, I am off to bake some more spooky meringue ghosts for my party. OoooOOooOoOo
---------------------------------------------------------------------------------------------------------------------------------------------------------------------------------------------------
* I normally use natural food colouring in my baking, but when you want the colour to be this strong only food dye will work, as natural food colouring looses its colour when baked.


Comments